
Dispatch: send a technician to the customer
The big one first. Until now a repair had to come to you — dropped off, picked up, or mailed in. Dispatch adds the fourth way: the customer stays put and your technician goes to them. That is a kind of job Spekco could not take before, and it comes with everything around it: the fee, the confirmation, the on-my-way text, the calendar.
Two smaller things ride along: customers can text the technician who has their repair, and New Ticket now asks its questions in the order you actually ask them. Here is what each one does, where it lives, and what it means for Monday morning.
Settings → Tickets → Dispatch · New Ticket → Service → Dispatch · Appointments
Send a technician to the customer — a whole new way to take work
For everything you fix that is bolted down, built in or too big to carry — an appliance, a workstation, a piece of furniture — the customer no longer has to bring it to you. Dispatch is the fourth service type next to drop-off, pickup and mail-in: you book the visit, the technician drives out, and the ticket runs like any other.
Set it up once under Settings → Tickets → Dispatch: switch it on, set how far you will travel, and the fee — flat, or per mile. Under Settings → Locations, tick the branches that send technicians out. If you want fixed visit windows, set them under Tickets → Scheduling → Dispatch; if you do not, any date and time works.
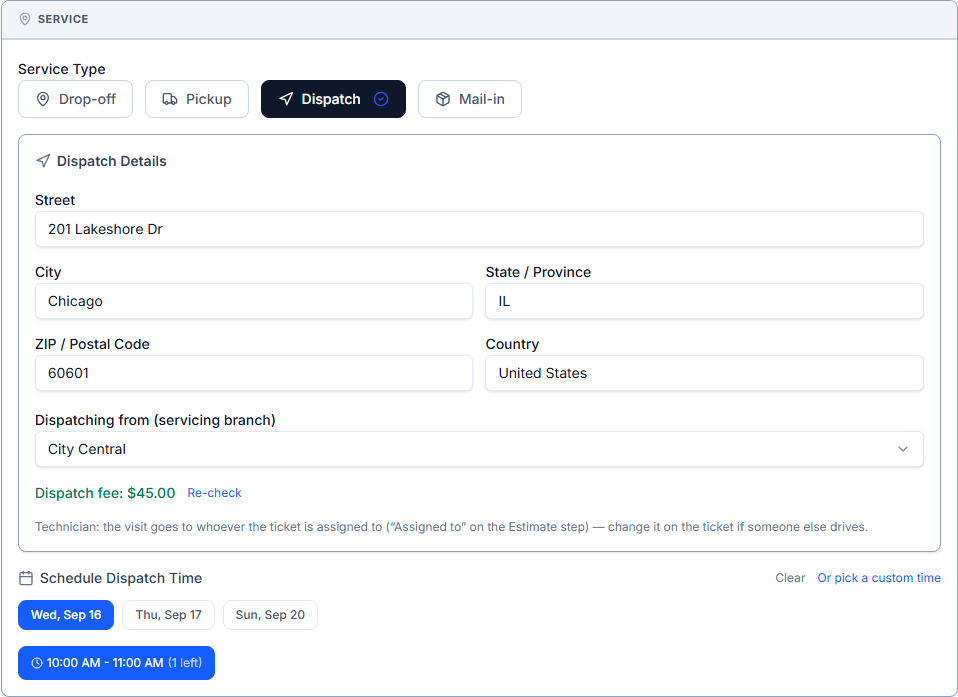
Booking happens while the customer is still on the phone. On New Ticket pick Dispatch: the visit address starts from the customer's, Spekco checks it against your radius and shows the distance and the fee before you commit — and lets you take a job just outside the radius anyway. Pick the time, and the ticket is created with the “Dispatch Service Fee” already on the estimate.
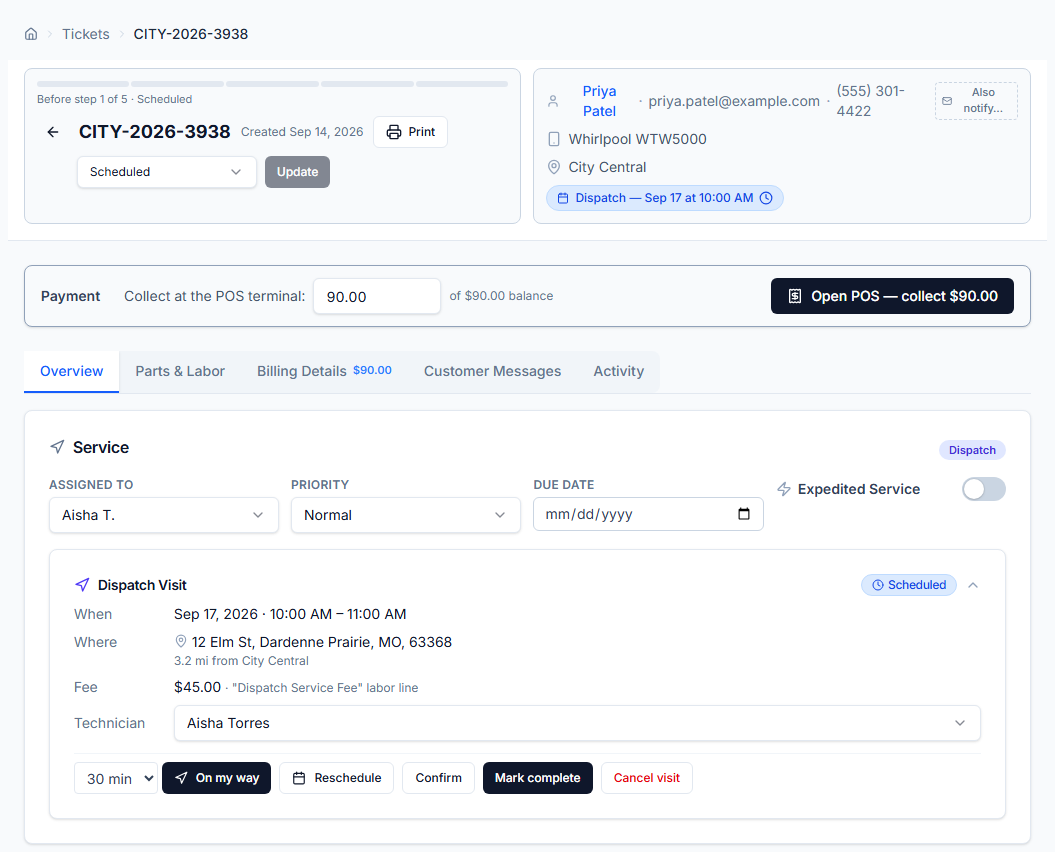
The customer hears from you right away: an email and a text asking them to confirm the visit — they reply C or tap the link — and the confirmation lands on the ticket. Reschedule with them on the phone and Spekco either marks the new time confirmed or asks them to confirm again; your call, one checkbox.
On the day, the technician opens the ticket and taps “On my way” with an ETA; the customer gets a text saying who is coming and when. Reschedule, Confirm, Mark complete and Cancel visit are one click each on the visit card, and when the ticket is completed or cancelled the visit closes with it — nothing is left dangling on the calendar. Booked a dispatch without a time? The same card offers “Schedule visit”.
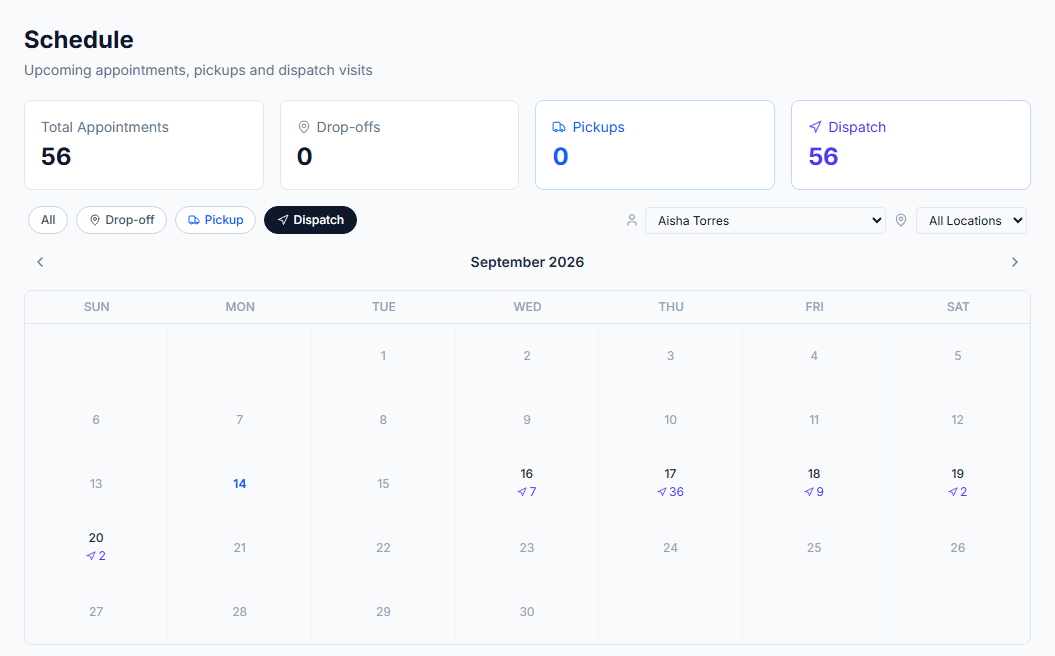
Appointments shows dispatch visits beside drop-offs and pickups, with a filter per kind and per technician and an amber Unassigned flag on any visit that still needs someone. Assign later from the visit card — the technician is notified — and every reschedule is written on the ticket: who moved it, from when to when.
Customers see the same thing on their side: the portal calls it a dispatch visit with the date, not a drop-off. The whole flow is written up in the Dispatch guide under Help.
What you need to do
Nothing until you want it — Dispatch is off for every shop until you switch it on under Settings → Tickets → Dispatch. Turn it on, set the fee, tick a location, and the Dispatch choice appears on New Ticket.
Settings → Integrations → Twilio · Settings → Employees
Customers can text the technician who has their repair
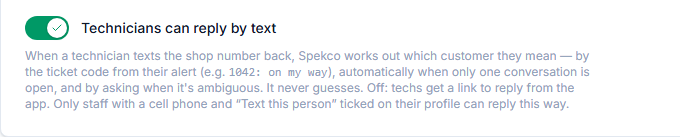
When a customer replies to a text from your shop, the technician assigned to that ticket gets it on their own phone and can answer from there. The customer only ever sees your shop's number; the technician's stays private.
Turn it on with “Technicians can reply by text” under Settings → Integrations → Twilio, then tick “Text this person for new customer messages and new online orders” on each technician under Settings → Employees. A technician can set it on their own profile too.
Both sides of the conversation are logged on the ticket, so the office still sees the whole thread.
What you need to do
Nothing until you want it — it is off for every shop. It needs Twilio connected, and a technician who has ticked “Text this person”.
Tickets → New Ticket
Take a ticket in the order you ask the questions
Step 1 is what the customer tells you: who they are, what they brought and what is wrong, and how you will handle it — drop-off, pickup, dispatch or mail-in, with only that choice's details. Pick the repair type there too, so any custom fields you have tied to a type appear right away.
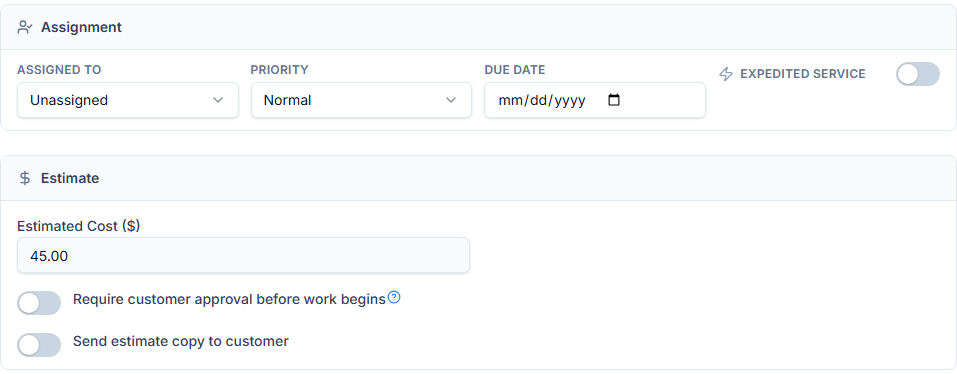
Step 2 is your side of it: the repair type and templates that fill parts and labor, who is on it, how urgent, when it is due and whether it is rushed, then the estimate and the approval toggle. The running total sits beside the step tabs the whole time.
The side column is gone on both screens, so the form has the full width, and the green “ticket created” banner is now a small toast that gets out of the way.
What you need to do
Nothing. Every field you had is still there; a few moved to the step where you actually decide them.