
Warranty Claims Paid by ACH, Repair Shop Setup From Your Website, Logo on Receipts
Four changes went live this week. The one to read first: a warranty vendor can now pay your claims by bank transfer, through your own Stripe or Square account, and a bank payment costs you a fraction of what a card payment costs.
The other three: a new shop can be set up from its own website, your logo prints on receipts, invoices and estimates, and a shared shop computer switches people with a PIN.
Each section ends with what you need to do. One of the four needs nothing.
Tickets → Warranty claims · a vendor's page · Settings → Integrations → Payments
Warranty Claims Paid by ACH Bank Transfer, Per Claim or on a Monthly Statement
A vendor that pays your warranty claims can now pay by bank transfer, through your own Stripe or Square account. Stripe calls it ACH Direct Debit.
The claim email, or the statement, carries a Pay by bank button. The vendor pays from its bank account, and the money reaches your account in about four business days.
A bank payment costs you less than a card payment:
- Stripe: 0.8% of the payment, capped at $5. A card is 2.9% plus 30¢.**
- Square: 1%, at least $1 and at most $5. A card is 2.9% plus 30¢.**
- On a $500 claim that is $4 or $5 instead of about $15. Because of the cap, a $2,000 statement still costs $5.**
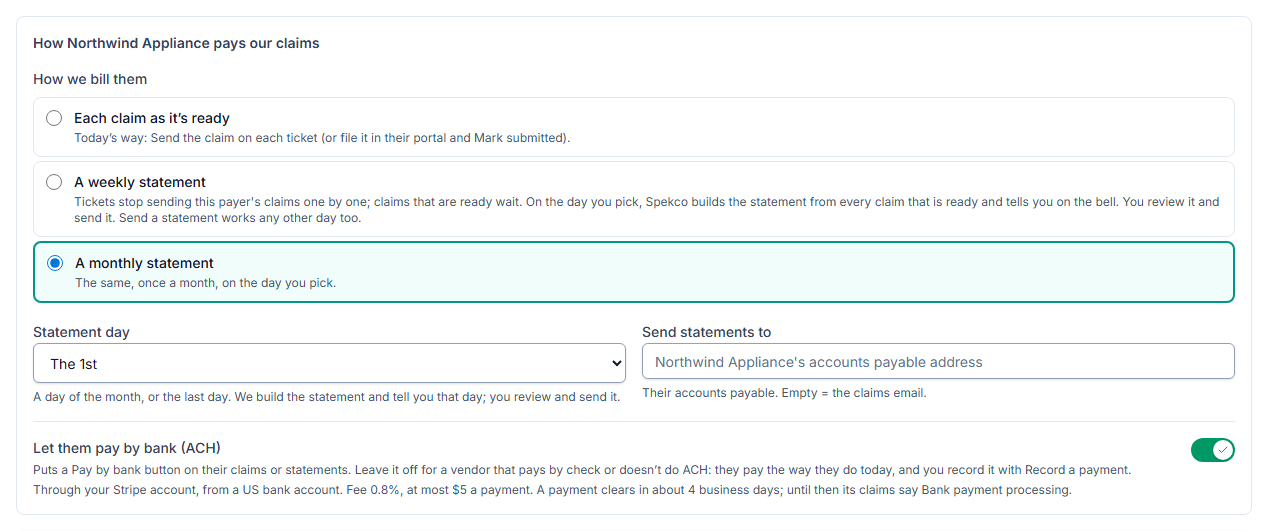
You choose how to bill each vendor, on the vendor's page:
- Each claim as it is ready, the way it worked before.
- A weekly or monthly statement: every approved claim on one statement, with one total. Pick the day, and where statements go if it is not the claims email.
A statement is ready on the vendor's day for you to review and send. You can also send one on any other day.
Warranty claims now opens with the totals, then Claims and Statements tabs. When a bank payment clears or fails, you get an email and a bell. A statement that is ready shows in the bell too.
**Processing rates are set by Stripe and Square, not by Spekco, and can change. These are the figures on their pricing pages on November 10, 2026; the two links below have the current ones.
What you need to do
Three steps. A vendor that pays by check keeps paying by check.
- Check Settings → Integrations → Payments: the Bank payments (ACH) card for your processor should read On. It does once your processor takes bank payments.
- Stripe only: turn on ACH Direct Debit in your Stripe Dashboard, and add the bank-payment events to your webhook. Help › Payment Webhook Setup lists them.
- On each vendor's page, turn on Let them pay by bank (ACH).
Setup Guide → Start from your website · Tickets → Equipment Catalog → Quick setup
Repair Shop Setup From Your Own Website, and AI Catalog Setup During the Free Trial
A new shop's Setup Guide now starts with Start from your website. Give it your site's address, and Spekco reads the site in the background, in a minute or two.
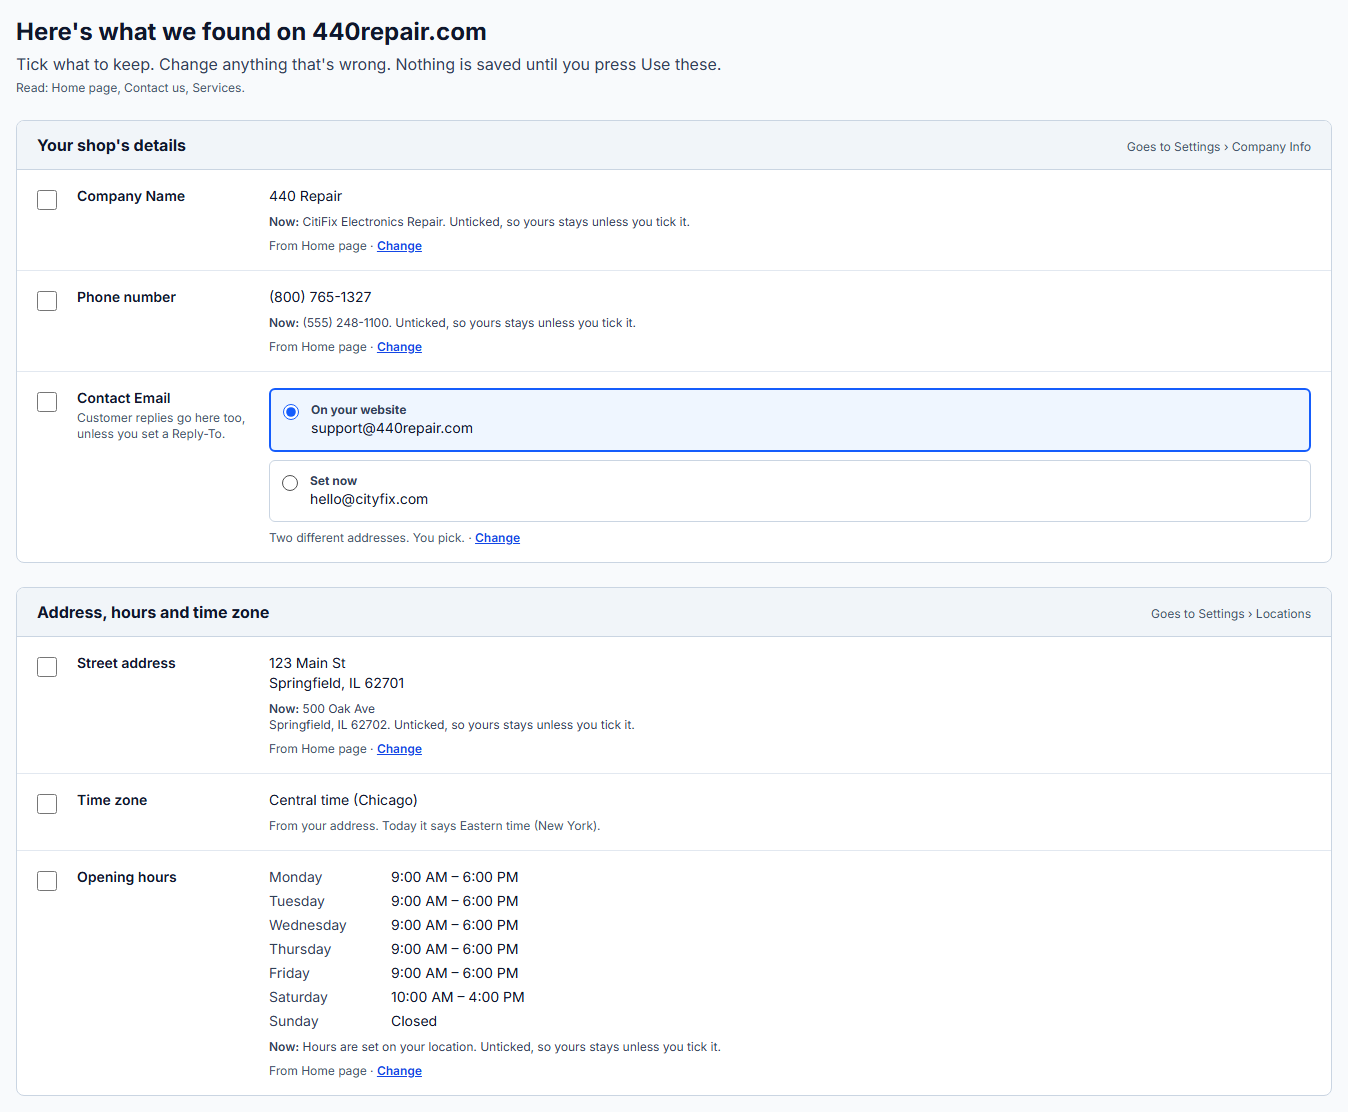
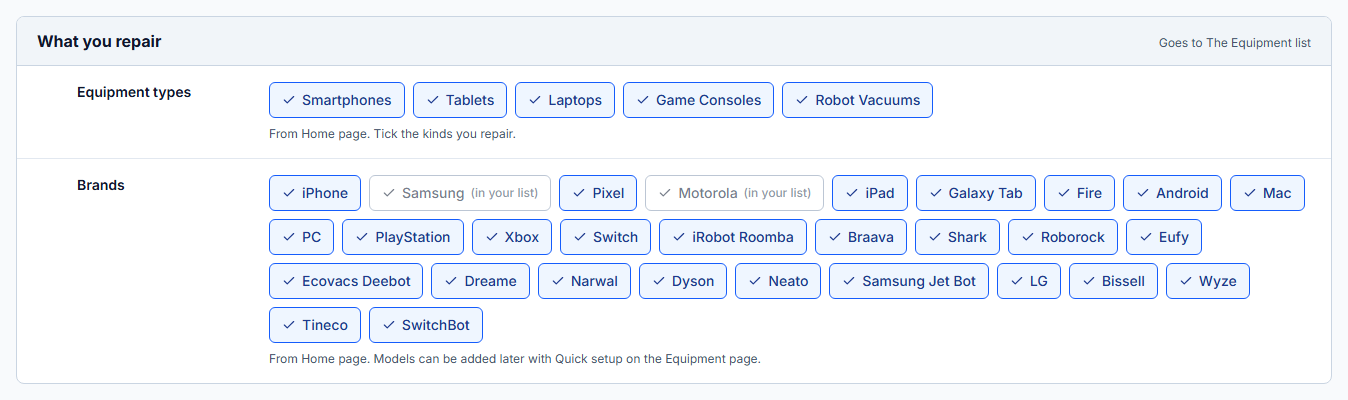
It then shows what it found, and where each thing came from:
- Your shop's name, phone and email.
- Your address and opening hours.
- What you repair, and the brands.
- Your warranty line and your About text.
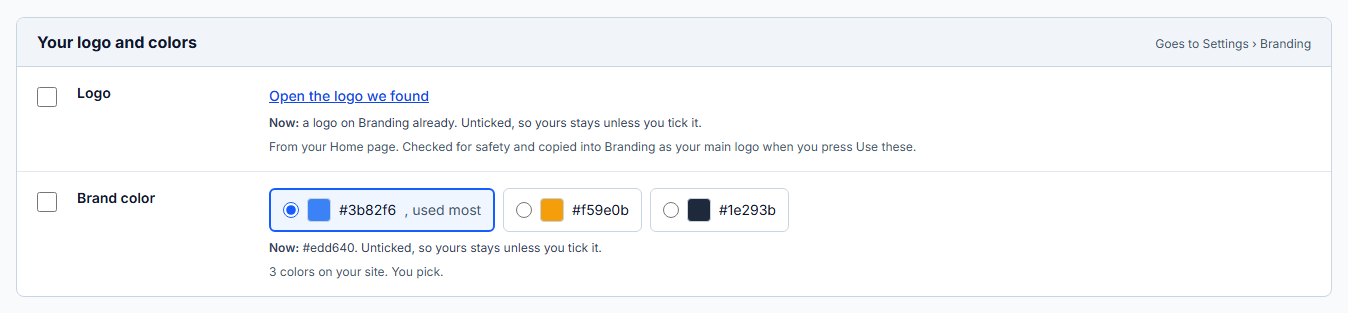
- Your logo, your colors and your social links.
Tick what to keep, change anything that is wrong, and press Use these. Nothing is saved until you press it.
Your logo is checked for safety and copied into Branding as your main logo. If the check is still running when you press Use these, the logo lands within a minute, and the guide says so.
Quick setup on the Equipment Catalog drafts your equipment types, brands and models from one sentence about your shop: tell it what you repair and press Suggest my setup, and it hands you a review screen. It now runs during a free trial too. It was for paid plans only.
What you need to do
Nothing. A new shop sees the card at the top of its Setup Guide. A shop that is already set up finds the same card there: the site's values show beside what is set now, unticked, so nothing changes unless you tick it.
Settings → Branding, under Logo & Identity
Print Your Logo on Receipts, Invoices and Estimates
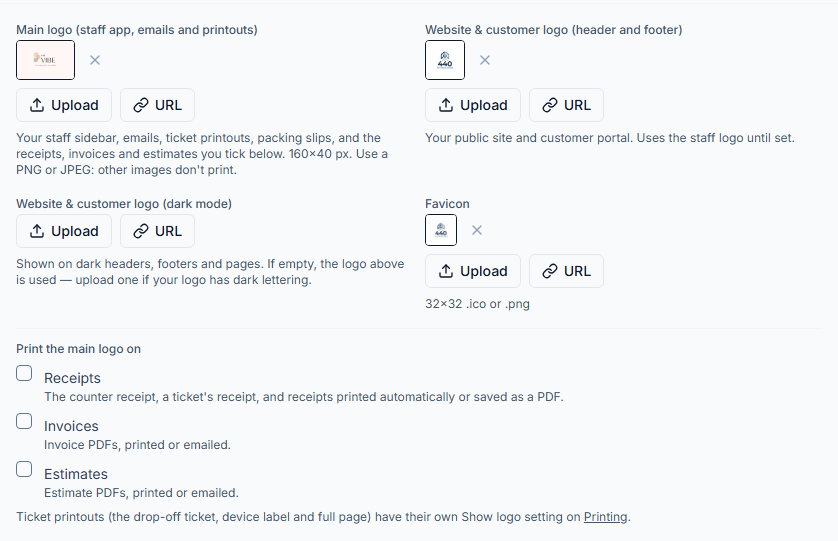
Under your main logo on Branding there are three switches, Print the main logo on: Receipts, Invoices and Estimates.
Each is off until you tick it, so nothing on your paperwork changed with this release.
Receipts covers the counter receipt, a ticket's receipt, the receipts printed automatically, and the receipt PDF.
Use a PNG or JPEG for the logo. Other formats do not print, and the page says so if yours is one.
What you need to do
Two steps.
- On Settings → Branding, under Print the main logo on, tick Receipts, Invoices or Estimates.
- Press Save Branding.
Top right of every page · Settings → Account & Company → Security, under Shop computers · My Profile → Switch PIN
Shared Shop Computer: See Who Is Signed In, Lock the Screen, Switch Users With a PIN
A browser keeps one sign-in for all of its tabs. On a shared computer, a note, a payment or a Clock In could be saved under whoever signed in last.
Three things now stop that, on every shop:
- Your picture or initials and your name sit at the top right of every page.
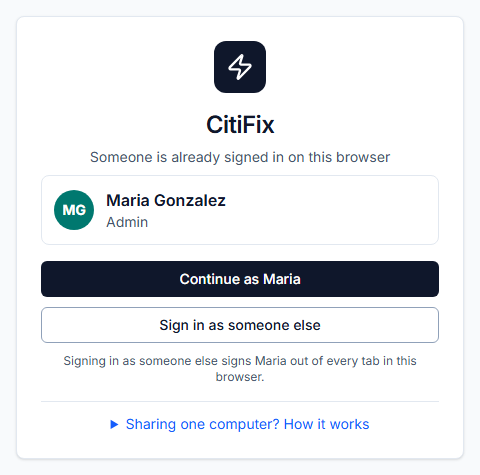
- The sign-in page says who is signed in on this browser, with Continue as or Sign in as someone else.
- When someone signs in on another tab, every other tab covers itself with a notice. A tab that has not noticed yet cannot save under the wrong name: Spekco refuses and shows the same notice.
Quick switching is for a shop computer. Each person signs in once a day with their email and password, and two-step if you use it. After that:
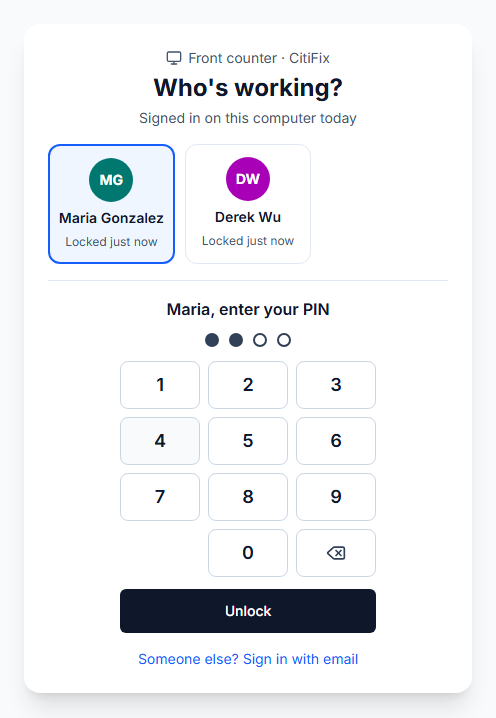
- Stepping away locks the screen, by itself after five minutes.
- Coming back, or swapping with a coworker, takes a short PIN.
- Who's working? lists everyone who signed in on that computer today. Tap your name, type your PIN, and you are back on the page you were on.
A PIN only reopens a sign-in made with the password on that computer in the last 12 hours.
What you need to do
The who-is-signed-in parts are on for every shop. Quick switching takes two steps.
- An admin turns on Quick switching on shared computers, under Shop computers on Settings → Account & Company → Security.
- Each person sets a 4 to 6 digit PIN on My Profile, under Switch PIN.